Stripe Billing Tutorial: Products, Prices, and Webhook – Subscription with Supabase and Stripe Billing | Part 2

Sandro Maglione
Get in touch with meWeb development
25 July 2022[updated]
•6 min read
Sandro Maglione
Web development
In this series, we are going to learn how to implement a subscription system with Stripe and Supabase. We will use Supabase Authentication, Supabase Database, and Stripe Billing.
This guide is not intended to be a complete walk-through of the code you need to write. It is instead an overview of the main steps and gotchas that I found in the process of learning how to set up the system. I will highlight the main API calls and give you access to external references and sources. It will be up to you to structure the system as you prefer and with any programming language of your choice.
This article is a Stripe Billing tutorial. We are going to learn how Stripe Billing works and how to set up your Products and Prices.
Check out Part 1 of the Subscription with Supabase and Stripe Billing series.
Feel free to reach out if you need any clarification.
What is Stripe Billing
If this is your first time working with Stripe, I warn you: It will be overwhelming! Hopefully, I will do my best to try to ease this initial learning phase for you.
The role of Stripe is to manage payments. You, as the developer, just need to interact with their API, call the correct endpoint, and enjoy a solid payment infrastructure working for you.
Stripe Billing is a product that allows you to collect periodic subscriptions.
A typical usecase goes as follow:
- A user signs up on your website because he is interested in your service. Your app registers the user's email and creates a new customer in Stripe associated with this email.
- Your service offers different plans (basic, premium, etc.). These are called Products in the Stripe dashboard.
- Each of your plans offers different prices based on the billing period (monthly, yearly, etc.). These are called Prices in the Stripe dashboard.
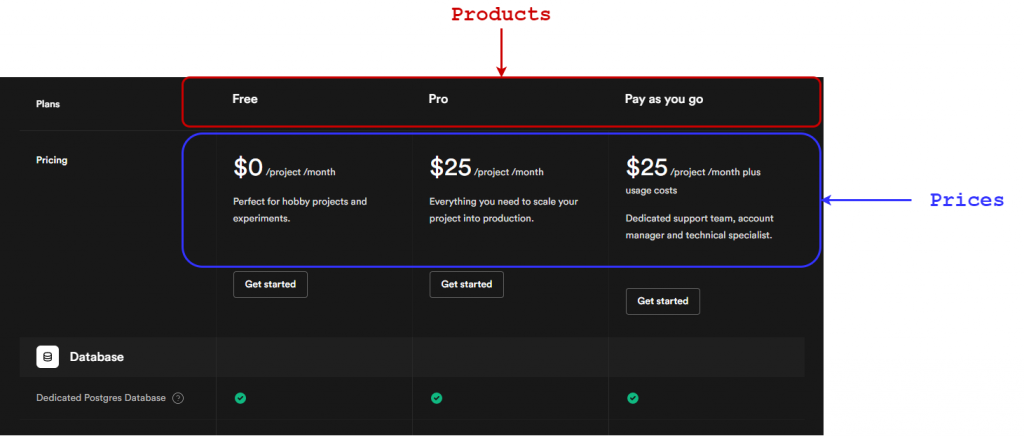
Supabase Products and Prices. A product is "what you get", a price is "how much you pay and how much time the subscription lasts".
- The user chooses the plan that he wants to sign up for.
- He inserts his full name and card information (the email is already available from the previous sign-up).
- He clicks on the "Subscribe" button.
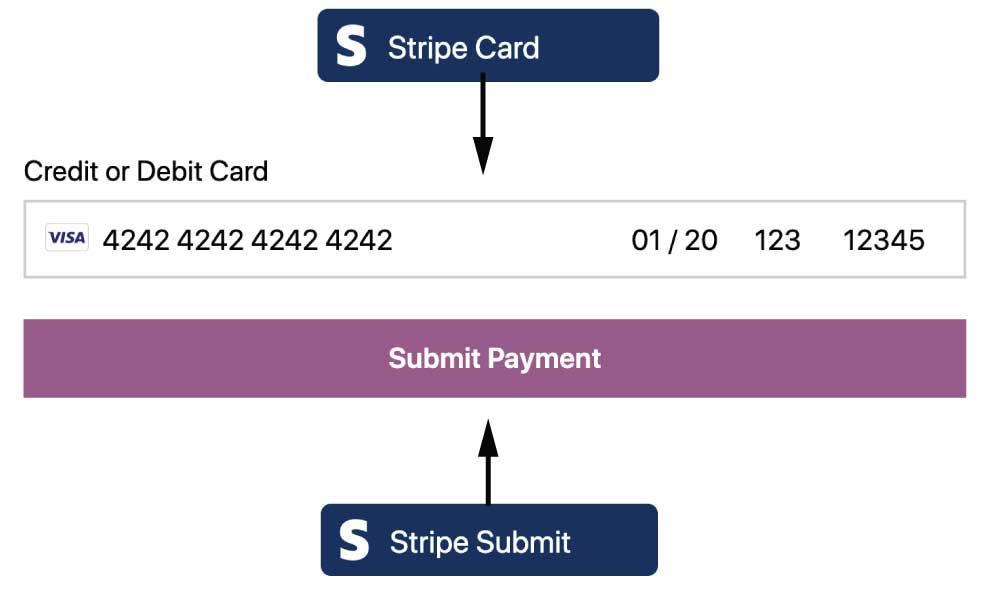
Example of card information using Stripe Elements.
- You, the developer, call the API of Stripe to create a new subscription.
- Stripe issues a new Invoice to the user and you, the developer, get paid.
- If everything works correctly, a new subscription is created for the user. The subscription will be active until the end of the billing period. After this period, Stripe will (try to) automatically renew the subscription.

A Customer pays a Price for a Product. He recieves an Invoice, he pays the invoice, and then he has a new active Subscription. Easy!
It seems complicated, it actually isn't. If you ever signed up for an online subscription service (Netflix? Amazon Prime?), this flow is basically the same every time.
What are Stripe Billing Webhooks
The complexity is all hidden behind something called a Webhook. A webhook is simply an API endpoint in your application that listens for Stripe updates.
You must update your own database to know when to provide your service to each user. How do you know when a new subscription is created if it is all managed by Stripe? Webhook!
Example of how a Webhook works
A webhook is a way for Stripe to tell you what happens.
Stripe: "Hey webhook, a new subscription has been created! You should do something about it!"
Webhook: "Ah, okay. I stored this information! Thank you Stripe, I send you a 200 response."
Stripe: "Good, I acknowledge that this event has been captured and handled. Bye bye."
At its core, a webhook is a method to sync your database with Stripe.
Why do I need to duplicate the data inside my database?
Stripe cannot handle all the requests of your application. They act as your payment manager, not as your database and butler! The Stripe API has some limits on the number of calls you can make.
Create Product in your Stripe Billing dashboard
The first thing you need for a user to subscribe to your service is a Product.
Enter in your Stripe dashboard and click on Products in the menu on the left. From here you can manually create a new Product.
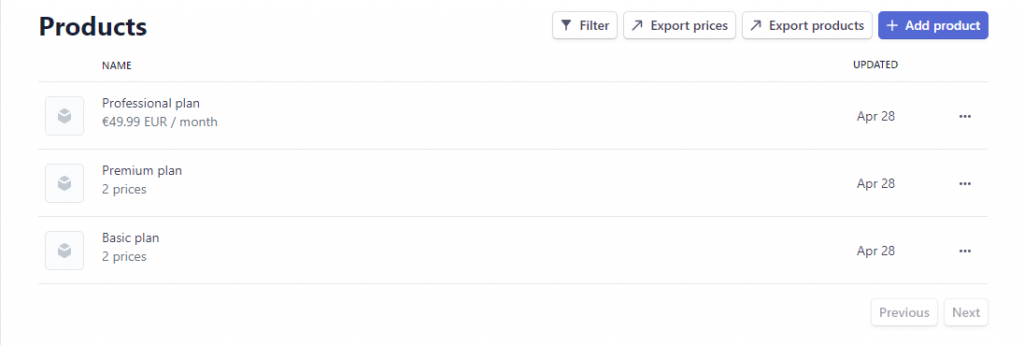
In the Stripe dashboard under Products, you can view the information about all the Products you create. Click on Add Product to create a new product.
A product represents the service you are selling to your customer. The product will identify what kind of features you should provide once a new user subscribes to your website.
Example of Subscription service
Are you offering an image editor web app? Good. A user subscribes and pays a monthly fee to upload his images and make them pretty. That is a Product.
Does your user want to also make videos pretty? Good. You create a new Product (which is obviously more expensive) and the user can choose between the "only images" Product or the "Images and Video" Product.
Create Prices for each Product on Stripe Billing
Your image editor software is great! How can you make it grow faster? You need more money in less time. The solution is called a "Yearly subscription".
Stripe gots you covered. Each Product can have different Prices. A Price states the amount of money the user has to pay and the duration of the subscription he signs up for.
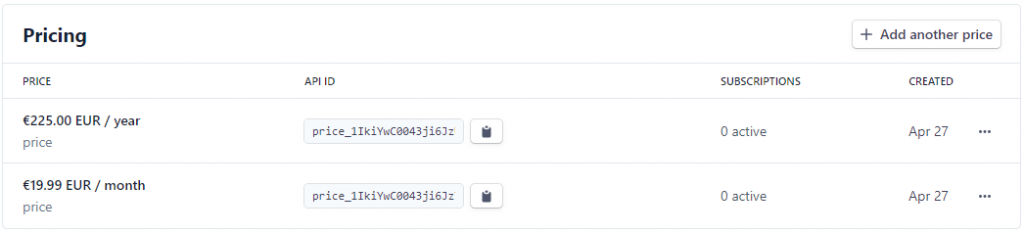
Click on a single Product and you can view and add new prices (monthly, yearly, etc.)
Your "Make images pretty" subscription can therefore be monthly (for only 19.99$/month), or yearly (for only 199.99$/year). Just enter the Product page on the Stripe dashboard and add a new price for your product.
That is all for now. You now know everything about webhooks, products, and prices (almost everything). In the next part, we will dive deeper into the actual implementation of the flow we learned today.
In the meantime, check out other articles on my website, I think you will enjoy them. Or you can also join my newsletter here below.