Create a NextJs project with Typescript, ESLint, Prettier and TailwindCSS

Sandro Maglione
Get in touch with meWeb development
26 August 2022[updated]
•5 min read
Sandro Maglione
Web development
Learn how to create a NextJs project with Typescript, ESLint, Prettier and TailwindCSS. NextJs is an amazing React framework that you can use to quickly create production-level application for the web. In this article, we are going to learn how to create and setup a new NextJs project with Typescript (types), ESLint (linting warning and errors), Prettier (code formatting), and TailwindCSS (CSS styling).
You can download a release of the final project configuration here below:
Create NextJs project using Typescript
We are going to create a NextJs project which comes already configured with Typescript. You simply need to run the following command, specifying the name of your project, and NextJs will take care of the rest:
npx create-next-app nameofproject --typescriptBelow the result of running the command. A new folder corresponding to the name of your project will be created. The folder contains the default project structure for a NextJs project using Typescript:
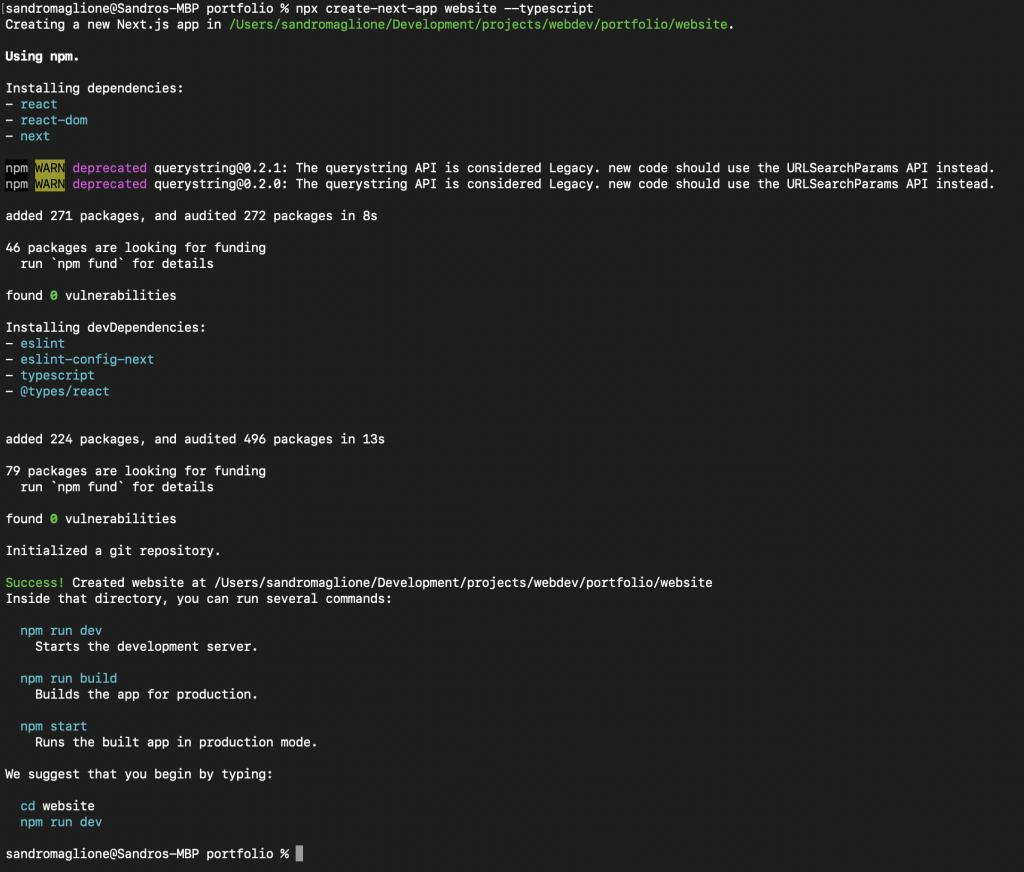
Running the command to create a new NextJs project using Typescript. A new folder will be created, containing all the default setup for a Typescript project.
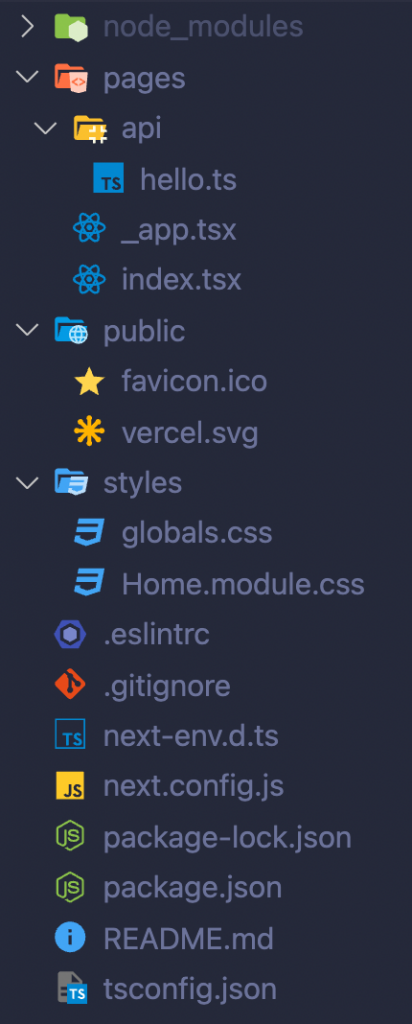
Initial NextJs folder structure for a new Typescript project.
Linting and Formatting using ESLint and Prettier
When you create a new project with NextJs 11 or above, a default ESLint configuration will be automatically added to the project.
A .eslintrc file will be created containing some predefined rules from NextJs. You also have a new command in package.json called lint.
We can extend the default configuration by installing Prettier:
npm install --save-dev prettier eslint-config-prettier eslint-plugin-prettierand installing eslint-typescript:
npm install --save-dev eslint @typescript-eslint/parser @typescript-eslint/eslint-plugin eslint-import-resolver-typescriptWe then apply these rules by updating the .eslintrc file as follows:
{
  "env": {
    "browser": true,
    "es2021": true
  },
  "extends": [
    "plugin:@typescript-eslint/recommended",
    "next",
    "next/core-web-vitals",
    "prettier"
  ],
  "parser": "@typescript-eslint/parser",
  "parserOptions": {
    "ecmaFeatures": {
      "jsx": true
    },
    "ecmaVersion": 12,
    "sourceType": "module"
  },
  "plugins": ["@typescript-eslint"]
}
We also create a configuration file for prettier called .prettierrc.js with the following content:
module.exports = {
  printWidth: 80,
  semi: true,
  singleQuote: true,
  tabWidth: 2,
  useTabs: false,
};
Since version 11.0.0 NextJS provides an integrated ESLint experience out of the box. This means that ESLint will be already installed when you first create your new app. Checkout out the official documentation for more info
There is more.
Every week I build a new open source project, with a new language or library, and teach you how I did it, what I learned, and how you can do the same. Join me and other 600+ readers.
Styling with TailwindCSS
First you need to install the required packages: tailwindcss, postcss, and autoprefixer.
npm install -D tailwindcss@latest postcss@latest autoprefixer@latestThen we are going to run the following command to initialise the tailwind project by creating the tailwind.config.js and postcss.config.js files:
npx tailwindcss init -pA new tailwind.config.js file has been created. We are going to update it to remove unused styles using the purge property. We are also going to enable the jit compiler:
module.exports = {
  mode: 'jit',
  purge: ['./pages/**/*.{js,ts,jsx,tsx}', './components/**/*.{js,ts,jsx,tsx}'],
  darkMode: false, // or 'media' or 'class'
  theme: {
    extend: {},
  },
  variants: {
    extend: {},
  },
  plugins: [],
};
Finally, we are going to apply tailwind styles to the project by overwriting the globals.css file inside the styles folder as follows:
@tailwind base;
@tailwind components;
@tailwind utilities;
You can then remove all the other CSS files since you won't need them if you use tailwindCSS.
Make sure that the globals.css file is included in the _app.tsx file inside pages:
import '../styles/globals.css'
import type { AppProps } from 'next/app'

function MyApp({ Component, pageProps }: AppProps) {
  return <Component {...pageProps} />
}

export default MyApp
Extra - Typescript paths
A final suggestion. In order to avoid nested imports and complicated paths, you can configure typescript to recognise some custom defined paths. You just need to update the tsconfig.json file by adding the baseUrl and paths properties. Typescript will now map each path specified in the paths object to the corresponding folder:
{
  "compilerOptions": {
    "target": "es5",
    "lib": ["dom", "dom.iterable", "esnext"],
    "allowJs": true,
    "skipLibCheck": true,
    "strict": true,
    "forceConsistentCasingInFileNames": true,
    "noEmit": true,
    "esModuleInterop": true,
    "module": "esnext",
    "moduleResolution": "node",
    "resolveJsonModule": true,
    "isolatedModules": true,
    "jsx": "preserve",
    "baseUrl": ".",
    "paths": {
      "@components/*": ["components/*"],
      "@utils/*": ["utils/*"],
      "@lib/*": ["lib/*"],
      "@services/*": ["services/*"]
    }
  },
  "include": ["next-env.d.ts", "**/*.ts", "**/*.tsx"],
  "exclude": ["node_modules"]
}
Below we can see the final folder structure and files for the project:
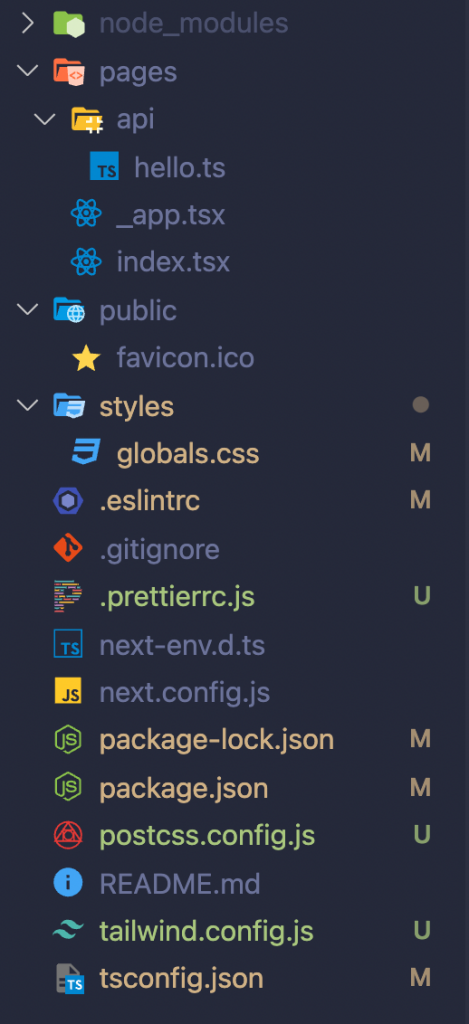
Final files and folder structure. All the files tagged with M have been modified, while files tagged with U have been updated.
You can now start working on your next amazing project, using a battle-tested and production ready setup!
If you learned something from the article, consider following me on Twitter at @SandroMaglione and subscribe to my newsletter here below 👇
Thanks for reading.